Table of Contents
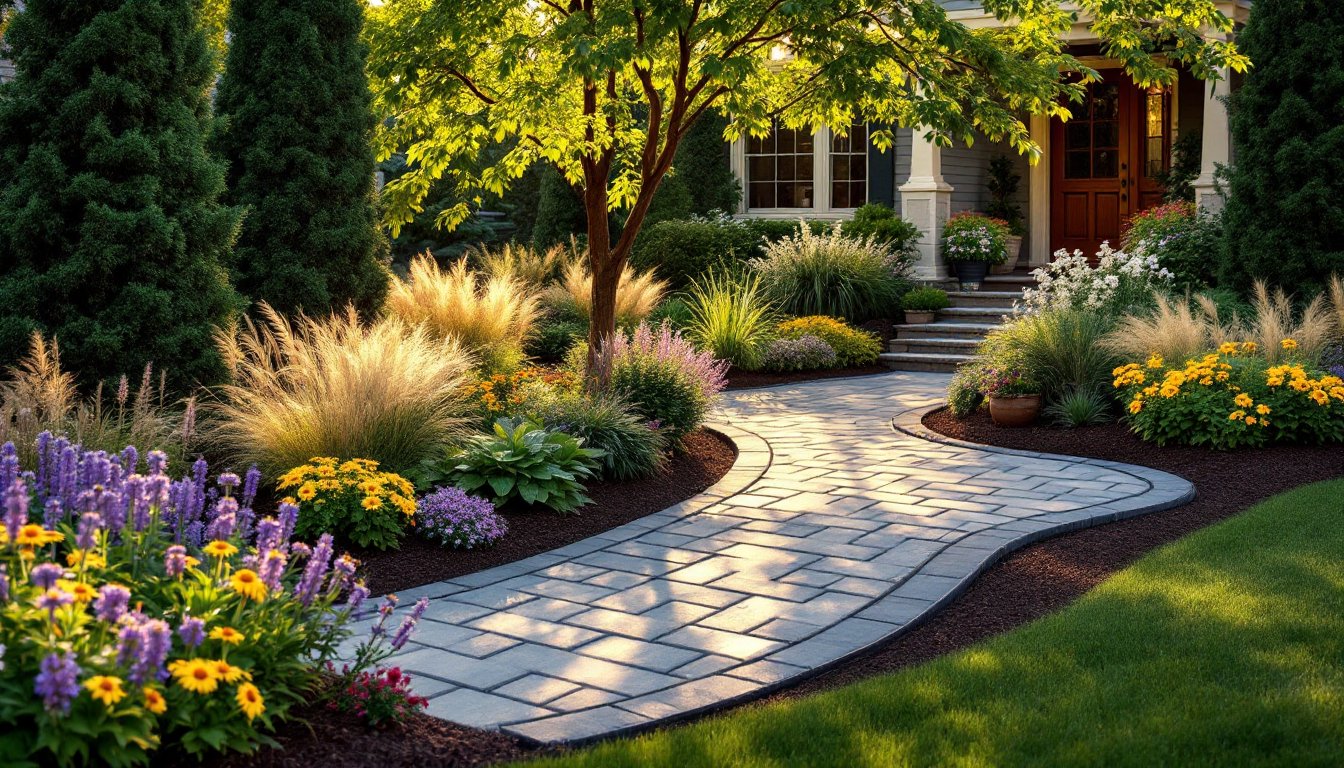
ToggleA well-designed front yard does more than boost curb appeal, it sets the tone for your entire home and can increase property value. Whether you’re working with a blank slate or refreshing an overgrown landscape, front yard landscaping ideas range from simple plantings to strategic hardscaping projects. The key is matching your design to your climate, maintenance comfort level, and budget. This guide walks you through practical steps to transform your front yard into an inviting outdoor space that reflects your home’s character while minimizing upkeep and cost.
Key Takeaways
- Plan your front yard landscaping ideas before purchasing plants—sketch to scale, measure sun exposure, and consider your home’s architectural style to create an intentional design.
- Native plants are the foundation of low-maintenance landscaping, requiring less water, fertilizer, and pest control once established while naturally crowding out weeds.
- Select plants that thrive in your specific USDA hardiness zone and match their sun and soil requirements perfectly to avoid years of struggling with decline.
- Hardscaping elements like pathways, patios, and edging provide essential structure that defines circulation and reduces lawn maintenance while improving drainage away from your foundation.
- DIY projects such as building planting beds and installing pavers can save thousands, but prioritize soil prep, adequate edging depth, and proper drainage—don’t skimp on structural foundations.
Plan Your Landscape Design With Purpose
Before breaking ground or buying plants, take a step back and plan. Sketch your yard to scale, even a rough drawing on graph paper helps. Measure the width of your front facade, the depth to the property line, and note sun exposure throughout the day (full sun, partial shade, full shade). Identify existing features: mature trees, slopes, or utility lines you’ll need to work around.
Consider your home’s architectural style. A modern ranch pairs well with clean lines and structured plantings: a cottage-style home suits layered perennials and curved beds. Visit your neighbors’ yards or scroll through landscape design ideas to gather inspiration that fits your region. Look at successful yards in your climate zone, they tell you what actually thrives there, not what looks trendy online.
Think about sight lines from the street. You want passersby to see your front door and feel welcomed, not blocked by overgrown shrubs. A focal point, a flowering tree, a welcoming entry, a water feature, draws the eye and makes your yard feel intentional. Finally, map out a phased approach. If budget is tight, prioritize pathways and foundation plantings first: add accent plants and features later as resources allow.
Native Plants and Low-Maintenance Greenery
Native plants are the backbone of a low-maintenance landscape. They’ve adapted to your local climate, soil, and water patterns, so they need less fertilizer, fewer pest controls, and often less supplemental watering once established. Before planting, check your regional native plant society or cooperative extension office for species suited to your zone and soil type.
Mix plant heights and textures to create visual interest without complexity. Place taller shrubs (3–5 feet) at corners or behind shorter plants: use groundcovers (6–12 inches) along edges. Incorporate evergreens for year-round structure, they anchor the design when deciduous plants go dormant. Grasses, sedums, and flowering perennials add movement and color with minimal intervention.
Consider a garden path flanked by low-growing natives. Daylilies, coneflowers, and black-eyed Susans thrive in most zones with moderate sun. In shadier spots, hostas, ferns, and shade-loving sedges offer texture without fuss. The payoff: fewer weeds because dense native plantings crowd them out, less watering after year two, and resilience during drought cycles.
Choosing Plants That Thrive in Your Climate
Select plants rated for your USDA hardiness zone, that’s the first filter. Then drill down: does the plant need full sun (6+ hours direct), partial shade (3–5 hours), or full shade? Does it prefer moist soil or well-draining? Mismatch on either front and you’ll spend years fighting plant decline. A plant thriving in dappled shade will sulk and attract pests in full sun: a sun-lover in shade becomes leggy and weak.
Start with slow-growing, dense shrubs that don’t require frequent pruning. Boxwoods, junipers, and compact hollies stay tidy and live decades. Pair them with perennials that spread at a moderate pace, ornamental grasses and dahlias fill gaps naturally. Skip fast-growing vines or shrubs unless you enjoy pruning: they’ll clog gutters and hide your windows within two seasons. Your local native plant nursery staff are invaluable, they’ll point you toward varieties bred for regional success and can spot hardiness mismatches instantly.
Hardscaping Elements for Structure and Function
Hardscaping, pathways, patios, edges, and borders, does the heavy lifting in a landscape design. It frames planting beds, defines circulation, and creates visual structure that holds a yard together even when plantings are dormant. Hardscaping also reduces lawn area, cutting mowing time and water use.
Choose durable materials: stamped concrete, natural stone, pavers, or brick. Concrete is economical and lasts 25+ years if sealed: stone carries a premium but weathers beautifully. Pavers are modular, so you can DIY installation in stages. Avoid materials that don’t suit your climate, sealed pavers can heave in freeze-thaw cycles: some natural stones spall (flake) in harsh winters.
Plan drainage carefully. Pathways and patios need a slight slope (1/8 inch per foot) away from your home’s foundation to shed water. Poor drainage leads to standing water, ice hazards, and accelerated deterioration. If your yard sits in a low spot or has clay soil, consider a French drain or a dry creek bed (a swale filled with gravel and native plants) to manage runoff while adding visual interest.
Pathways, Patios, and Edging Solutions
A simple walkway from the street to your front door signals purpose and care. Pavers or flagstones set on a compacted gravel base work well for DIY installation, lay out a grid, level the base, set each stone, and backfill with polymeric sand (it hardens when wet and locks pavers in place). Allow 36–48 inches width for a welcoming path: anything narrower feels cramped. If you’re pouring concrete, rent a mixer or order ready-mix: hand-mixing bags is brutal. Slope it 1/8 inch per foot and broom-finish the surface for traction.
Edging defines beds and keeps mulch from migrating into lawn. Metal landscape edging (steel or aluminum, 4–6 inches deep) is durable and adjustable: plastic edging flexes for curves but degrades in UV. Brick or stone edging is permanent and suits traditional homes. The key is depth, shallow edging fails because mulch and soil creep over it. Go deep, backfill and compact firmly, and your beds stay crisp for years. A small patio or seating area near the entry invites lingering. Even 8×8 feet of pavers creates a functional space for a bench or planters. This is where garden ideas meet practical hardscape, combine seating with plantings for a welcoming vignette.
Budget-Friendly DIY Landscaping Projects
Transform your front yard without draining savings by tackling projects yourself. Start with mulching beds, installing edging, and planting shrubs, you’ll see dramatic change for modest outlay. Here’s what you can realistically DIY:
Materials and costs (approximate, regional variation expected):
- Landscape fabric and mulch: $2–5 per square foot
- Metal edging: $1–3 per linear foot
- Pavers or flagstones: $4–15 per square foot installed
- Perennials and shrubs: $15–50 each
- Basic seed or sod: $0.50–2 per square foot
Step-by-step project: Create a planting bed
- Outline the bed with a garden hose, curves are more forgiving than straight lines. Mark with spray paint.
- Cut the turf edge with a spade or edger. If the lawn is established, remove sod (you can rent a sod cutter for $50–75/day) or strip it by hand with a flat shovel.
- Loosen the soil 8–10 inches deep using a broadfork or tiller. Add 2–3 inches of compost and work it in.
- Lay landscape fabric to suppress weeds. Overlap seams by 6 inches and pin down with staples.
- Lay metal or stone edging along the perimeter, sinking it at least 4 inches deep.
- Space plants according to their mature width. Stagger rows for a natural look. Dig holes, amend backfill with compost, water deeply, and mulch around each plant (2–3 inches, keeping it 4 inches away from stems to prevent rot).
For hardscaping, paver installation is achievable with patience. Excavate 4–6 inches (accounting for base and pavers), compact a 2-inch gravel base, set pavers level with a rubber mallet, and backfill with polymeric sand. The Spruce and similar resources walk through detailed paver installation techniques, so review before you start. Concrete work is trickier, mixing, finishing, and curing all demand precision. If you’re not confident, hire that part and DIY the finishing (staining or sealing).
Where to save: buy plants from local nurseries in late season (end of summer) when stock is discounted. Propagate cuttings from mature plants in your yard. Use composted leaves as mulch instead of bagged. Skip trendy accent items and focus on green infrastructure, trees and shrubs deliver value longer than decorative pots or lighting (though those come later). If you’re handling soil work, rent a tiller instead of buying, it pays for itself in one project.
Where not to cheap out: don’t skip soil prep. Planting in compacted, nutrient-poor soil dooms even hardy plants. Don’t use landscape fabric if you plan mixed perennials, you’ll fight it annually. Don’t skimp on structural elements like edging or drainage: they cost more to fix later. Finally, if you’re working near utilities or planning anything requiring a permit (check local codes, some jurisdictions require permits for grading, drainage, or structures), hire a professional or at minimum call before you dig.
Conclusion
A transformed front yard isn’t a one-weekend project, it’s a phased investment that pays dividends in curb appeal, property value, and pride of ownership. Start with a clear plan, choose plants and hardscape suited to your climate and style, and tackle projects in order of impact. Native plantings, smart edging, and thoughtful pathways create a landscape that’s both beautiful and maintainable. Build in phases, stay realistic about DIY scope, and don’t hesitate to hire pros for complex structural work. Your future self will thank you for a well-planned yard that thrives.